
Have you ever found yourself overwhelmed by the constant stream of iMessages popping up on your Macbook screen? It’s like trying to have a peaceful conversation in a bustling marketplace. But fear not, for there is a way to regain control over your messaging experience.
In this discussion, we will explore the steps to turn off iMessage on your Macbook, allowing you to manage your messages effectively and reclaim your tranquility.
But that’s not all – we’ll also delve into the realm of customizing iMessage settings, troubleshooting common issues, and even syncing messages across your Apple devices.
So, let’s dive in and discover the secrets of managing iMessage on your Mac.
Why Turn off Imessage on Macbook?
If you’re experiencing performance issues or want to minimize distractions, it’s a good idea to turn off iMessage on your Macbook. While iMessage can be a convenient way to stay connected with friends and family, it can also consume valuable system resources and lead to decreased performance on your Macbook. By turning off iMessage, you can free up memory and processing power, allowing your Macbook to run smoother and faster.
Another reason to consider turning off iMessage on your Macbook is to minimize distractions. With iMessage constantly delivering new messages and notifications, it can be difficult to stay focused on your work or tasks at hand. By disabling iMessage, you can eliminate the constant stream of distractions and maintain better concentration.
Additionally, turning off iMessage on your Macbook can help protect your privacy and security. If you frequently use public Wi-Fi networks, there’s a risk that your iMessage conversations could be intercepted or accessed by unauthorized individuals. By disabling iMessage, you can ensure that your messages remain private and secure.
Steps to Disable Imessage on Macbook
To disable iMessage on your Macbook, follow these simple steps.
First, open the Messages app on your Macbook. You can do this by clicking on the Messages icon in your dock or by searching for it in the Applications folder.
Once the Messages app is open, click on the ‘Messages’ option in the menu bar at the top of the screen. A dropdown menu will appear, and you’ll need to select ‘Preferences’ from this menu.
In the Preferences window, click on the ‘Accounts’ tab. This will show you a list of all the messaging accounts associated with your Macbook. Locate the iMessage account and click on it to select it. Then, click on the ‘Sign Out’ button to log out of your iMessage account.
A confirmation pop-up will appear, asking if you’re sure you want to sign out. Click on ‘Sign Out’ again to confirm your decision.
Once you have signed out of your iMessage account, you have successfully disabled iMessage on your Macbook. You’ll no longer receive or send iMessages on your Macbook.
If you decide to use iMessage again in the future, simply follow these steps and sign back into your iMessage account.
Managing Imessage Notifications on Mac
Are you tired of being bombarded with constant iMessage notifications on your Mac?
Well, you’re in luck because there are several ways you can manage and customize your notification settings.
You can easily mute specific conversations that aren’t as important and choose to only receive notifications from important contacts.
Additionally, if you value your privacy, you can disable message previews to ensure that your incoming messages remain private.
Notification Settings Customization
Customize your iMessage notification settings on your Mac to ensure you only receive the notifications that are most important to you. By customizing your notification settings, you can avoid unnecessary distractions and stay focused on what matters.
To get started, open the Messages app on your Mac and go to Preferences. From there, click on the Notifications tab. Here, you can choose how you want to be notified for new messages, whether it’s through a sound, a notification banner, or a badge on the app icon.
You can also customize the alert style and decide if you want to show previews of incoming messages. Additionally, you have the option to enable or disable message notifications from specific contacts.
Take control of your iMessage notifications and streamline your Mac experience.
Muting Specific Conversations
Muting specific conversations on your Mac allows you to silence notifications for certain iMessage chats. This feature can be helpful when you want to temporarily or permanently stop receiving alerts for a particular conversation.
To mute a conversation, simply open the Messages app on your Mac and locate the chat you wish to silence. Right-click on the conversation and select ‘Mute’ from the drop-down menu. Alternatively, you can also go to the ‘Details’ tab within the conversation and click on the ‘Do Not Disturb’ button.
Once muted, you’ll no longer receive any notifications for that specific conversation, allowing you to focus on other tasks without any interruptions.
Disabling Message Previews
To further customize your iMessage experience on Mac, you can disable message previews to maintain privacy and minimize distractions. By disabling message previews, you prevent the content of incoming messages from being displayed on your Mac’s lock screen or in the notification center.
This is especially useful if you often use your Mac in public spaces or if you share your computer with others.
To disable message previews, go to the Apple menu and select ‘System Preferences.’ Then, click on ‘Notifications’ and choose ‘Messages’ from the list on the left. From there, you can uncheck the box next to ‘Show message previews.’
Once disabled, you’ll still receive notifications for new messages, but their content will remain hidden until you choose to open the Messages app.
Customizing Imessage Settings on Mac
You can personalize your iMessage experience on your Mac by adjusting the settings to suit your preferences. Customizing iMessage settings allows you to have more control over how you communicate with others using the app. To get started, open the Messages app on your Mac and click on ‘Preferences’ in the menu bar. From there, you can customize various aspects of iMessage.
One setting you can customize is the appearance of your messages. You can choose to display messages in a different font, size, or color. This allows you to make your messages stand out and reflect your personal style.
Another setting you can adjust is the notifications. You can choose whether you want to receive notifications for new messages, and if so, how you want them to be displayed. You can customize the alert style, whether you want banners or alerts, and even set a specific sound for incoming messages.
Additionally, you can customize your iMessage account settings. You can choose which phone numbers and email addresses are associated with your iMessage account, as well as manage your blocked contacts and manage how messages are sent and received.
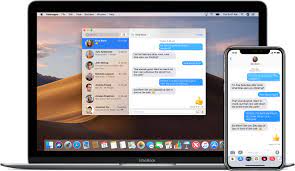
Syncing Imessage Across Apple Devices
Sync your iMessage across all of your Apple devices effortlessly. With Apple’s seamless integration, you can ensure that your iMessage conversations stay in sync across your iPhone, iPad, and Mac. By syncing your iMessage, you can start a conversation on one device and continue it on another without missing a beat.
To enable iMessage syncing, make sure you’re signed in to the same Apple ID on all of your devices. This ensures that your messages are associated with your account and can be accessed from any device. Simply go to the Settings app on your iPhone or iPad, tap on your Apple ID at the top, and then select ‘iCloud.’ Ensure that the ‘Messages’ toggle is turned on. On your Mac, open the Messages app, go to Preferences, and click on the ‘Accounts’ tab. Make sure your Apple ID is listed and the ‘Enable this account’ option is checked.
Once you have enabled iMessage syncing, all of your conversations, message history, and attachments will be available on all of your devices. You can start a conversation on your iPhone, continue it on your iPad, and finish it on your Mac without any hassle. Additionally, any changes you make to your iMessage settings on one device will be automatically applied to all of your other devices.
Syncing iMessage across your Apple devices ensures a seamless messaging experience and keeps you connected no matter which device you’re using.
Troubleshooting Imessage Issues on Mac
If you’re experiencing issues with iMessage on your Mac, there are a few troubleshooting steps you can try to resolve the problem.
First, check your internet connection to ensure it’s stable and working properly. A weak or unstable connection can cause problems with iMessage.
Next, verify that you’re signed in to iMessage with the correct Apple ID. Go to the Messages app, select ‘Preferences’ from the menu, and then click on the ‘Accounts’ tab. Make sure your Apple ID is listed and selected. If it’s not, sign in with the correct account.
Additionally, make sure that your Mac’s software is up to date. Updates often include bug fixes and improvements that can resolve issues with iMessage. To check for updates, go to the Apple menu, select ‘System Preferences’, and then click on ‘Software Update’.
Finally, if the problem persists, try signing out of iMessage and then signing back in. This can refresh the connection and resolve any temporary glitches. To sign out, go to the Messages app, select ‘Preferences’, click on the ‘Accounts’ tab, and then click on ‘Sign Out’. After signing out, sign back in with your Apple ID.
Hopefully, these troubleshooting steps will help resolve any iMessage issues you’re experiencing on your Mac.
Conclusion
In conclusion, managing iMessage on your MacBook is essential for a seamless messaging experience.
Whether you need to turn it off temporarily, customize settings, or troubleshoot any issues, these steps will help you navigate through the process.
By syncing iMessage across your Apple devices, you can stay connected wherever you are.
So take control of your iMessage notifications and enjoy a smoother messaging experience on your Mac.